

This is an old trick, but as my clients ask me about it all the time, I’m providing the following instructions on how to add a new sending address to your Gmail.
If you have an email address that forwards to your Gmail account, you can add that email address as a “Send mail as” address such that you can send emails “from” that address. In addition, you can tell Gmail to use an alternate email signature when sending from that address. In other words, you can use a forwarding address with your Gmail and have it appear as though you’re using a completely separate email account.
Follow these steps to setup a “Send mail as” address in Gmail:
- In your Gmail, goto Settings > Accounts and Import.
HINT: Access your Gmail settings via the “gear” icon in the upper right corner: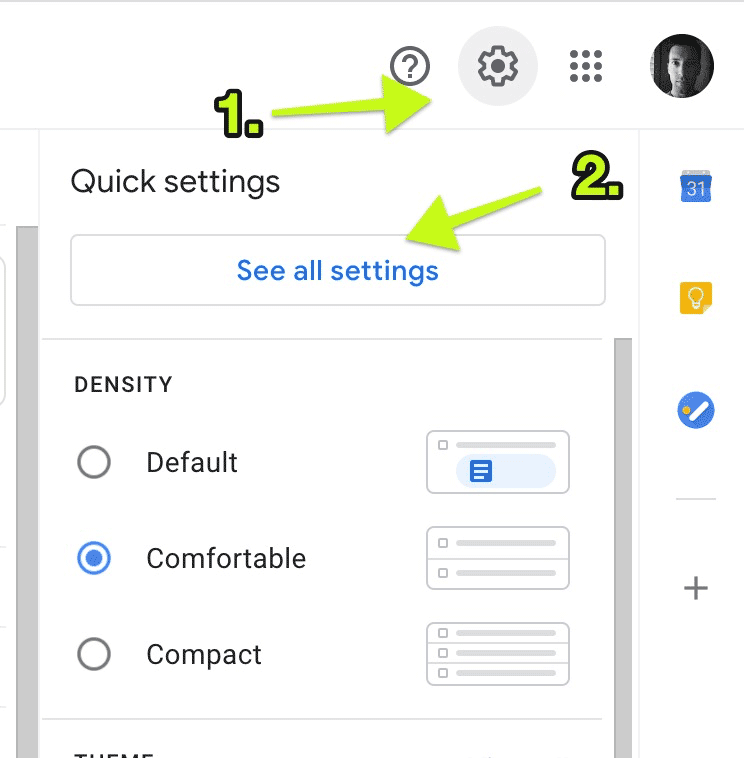
- Under Send mail as, select “Add another email address” and follow the prompts*.
- While you’re in Accounts and Import, I recommend selecting the following option:

- Once you’ve verified your new Send mail as email address, you can goto Settings > General, scroll down to the Signature section, and setup a unique signature for the new email address you’ve added to your account.
* When you’re adding a new Send mail as email address, there’s one big “gotcha!” Gmail is going to ask you to enter an SMTP server username and password (they do that to prevent spammers from using this feature). If you’re one of my clients, I can provide you with those credentials. Otherwise, you can use a service like SMTP2GO to setup an SMTP server username/password.
Your SMTP2GO credentials will be:
- SMTP Server: mail.smtp2go.com
- SMTP Port: 2525
- Alternative ports: 8025, 587, 80 or 25. TLS is available on the same ports. SSL is available on ports 465, 8465 and 443.
- SMTP Username: (Either setup a user at SMTP2GO, or my clients will receive this from me)
- SMTP Password: (see above)
Leave a Reply